|
Granola Bars 1 4 Cups oatmeal (I prefer Old Fashioned) 1 1/2 Cups chopped nuts 1 Cup packed brown sugar 3/4 Cup butter 3/4 Cup Honey (I actually lower this to half cup) 1 tsp vanilla 1 tsp salt (optional) Preheat oven to 450 degrees F. Combine all ingredients in a large bowl, then mix well. Lightly butter a baking sheet. Pack mixture firmly onto baking sheet. Bake 10-12 minutes, in preheated oven. Cool thoroughly. Cut into squares. Individually wrap each in parchment or plastic. Store in the fridge. Granola Bars 2 1 1/2 Cups chunky peanut butter 1 Cup Honey 3/4 Cup Brown sugar 5 cups oats 1 - 6 oz package of dried fruits Combine peanut butter, honey and brown sugar in a large saucepan. Bring to a biol, stirring constantly. Remove from heat; quickly add fruit pieces and oats. Using a buttered spatula, press into a 13 by 9 pan that has been lightly buttered. Cool 15 minutes. Cut into 18 bars. Allow to cool completely after cutting. Individually wrap each in parchment or plastic. Store in the fridge.
Low Fat Granola 7 Cups old fashioned oats 1/2 Cup unsweetened shredded coconut 1/2 Cup wheat germ 1 1/2 Cups nuts (I like walnuts) 2 tsp cinnamon 2 Cups dried fruit (I prefer it a little lighter, so I use 1 1/2 cups raisins) 1/2 Cup plus 3 Tbsp of honey 1/3 Cup Molasses 1 tsp vanilla Mix dry ingredients together well in large bowl. Place honey, and molasses in a small pot, heat just to make runny, do not boil. Add vanilla and mix well. Drizzle over oat mix in bowl, mixing as you go. Mix well to coat. You can work through with your hands if you like but makes you very sticky! Spread in two large flat pans with sides (I have cookie sheets with sides). Set oven to 325 and bake for 20-30 minutes, making sure to stir every ten minutes. Cool. Store in a cool, dry place for up to four weeks. NOTE: You can dehydrate this recipe at highest setting until no longer sticky. I find this takes an awfully long time, though. I prefer the oven. You can also bake in the oven for longer at a lower temperature.
Passover and the Feast of Unleavened Bread are fast approaching. It is time to start stocking the pantry with ingredients that you can use to make delicious dips and such for enjoying unleavened bread each day. One of our favorites is hummus - both traditional as well as Lentil Hummus. Here are my recipes - remember! Jim and I LOVE garlic - so these are on the pungent side! You CAN reduce the amount of garlic if you choose.
Enjoy!!! Hummus 1 1 (15-ounce) can chickpeas (drain and set liquid aside!), or about 2 cups drained, cooked chickpeas (Save some of the liquid) 3 tablespoons extra-virgin olive oil 3 tablespoons tahini 1 1/2 tablespoons freshly squeezed lemon juice (from 1/2 lemon), plus more as needed 3-8 small cloves garlic, pressed (Pressing draws out more flavor and oils) 1/2 teaspoon salt (We add more salt per serving as desired at the table) 1/2 teaspoon freshly ground black pepper Drain chickpeas, setting aside liquid. Place all ingredients except liquid from beans in the food processor and puree. Add small amounts of chickpea liquid as needed to ensure smooth processing. Process until creamy – may take up to 5 minutes. Scrape into a bowl and chill. Serve as desired. NOTES: I find that the canned chickpeas are MUCH better to puree and make a much smoother hummus, but you can us the cooked ones if you would like. It is always best to remove as many of the skins from either variety. Removing the skins makes the smoothest hummus! The key ingredient is the tahini – it has to be in there to taste like the hummus in the stores and restaurants! We like A LOT of garlic – so we usually lean toward the 8 cloves. We also tend to use lime juice, not lemon. And I cut the amount in half, so it has the citrus flavor, but not over powering lime. Sometimes, we will sprinkle a little cilantro on the top after drizzling olive oil on each serving. Maybe even some additional pressed garlic. Also roasted red peppers are yummy, too! Hummus 2 1 (15-ounce) can lentils (drain and set liquid aside!), or about 2 cups drained, cooked lentils (Save some of the liquid) 3-4 tablespoons extra-virgin olive oil 3 tablespoons tahini 1 1/2 tablespoons freshly squeezed lemon juice (from 1/2 lemon), plus more as needed 3-8 small cloves garlic, pressed (Pressing draws out more flavor and oils) 1/2 teaspoon salt (We add more salt per serving as desired at the table) 1/2 teaspoon freshly ground black pepper Drain lentils, setting aside liquid. Remove hulls. (VERY important with lentils to try and remove the skins!) Place all ingredients except lentil liquid in the food processor and puree. Add small amounts of liquid as needed to ensure smooth processing. Process until creamy – may take up to 5 minutes. Scrape into a bowl and chill. Serve as desired. Notes: All notes for chickpea can apply to the lentil Hummus, too. An additional note, the lentil version tends to be MUCH thicker and may require much more added liquid to make it creamy. I also tend to add the extra tablespoon of olive oil – it just makes it creamier. My Best Gluten Free Bread So Far!
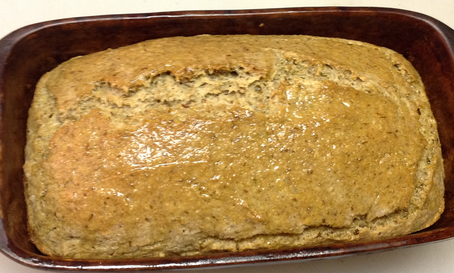
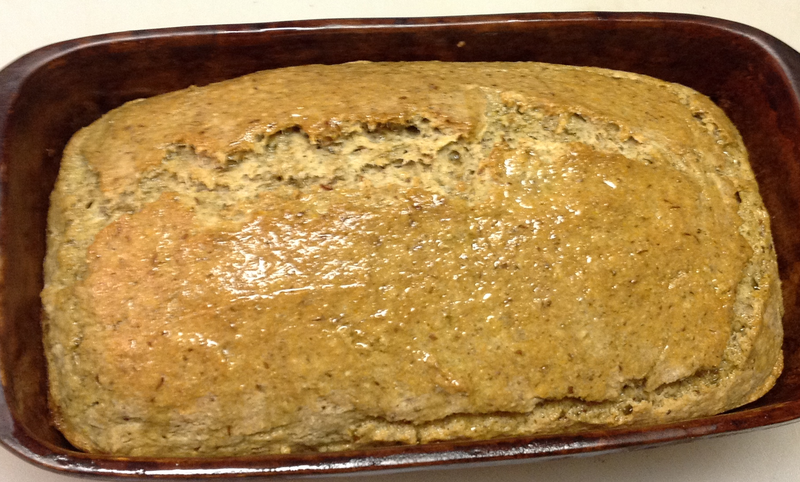
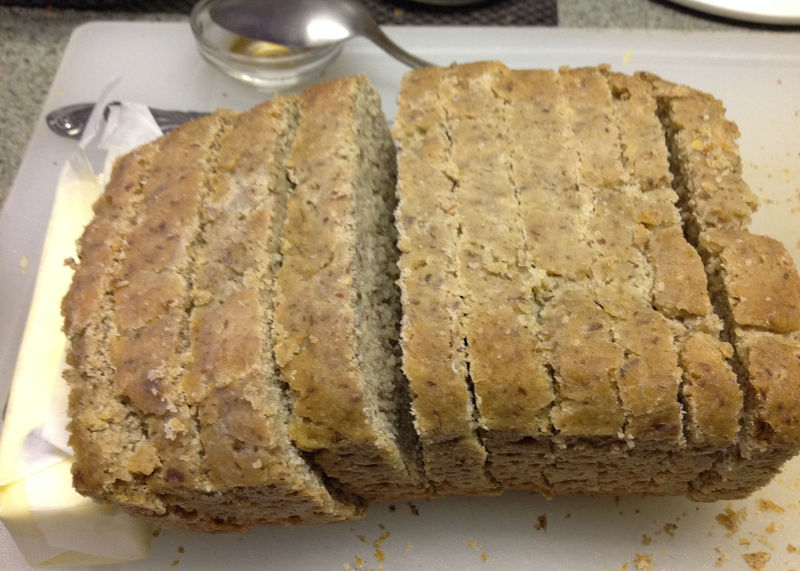
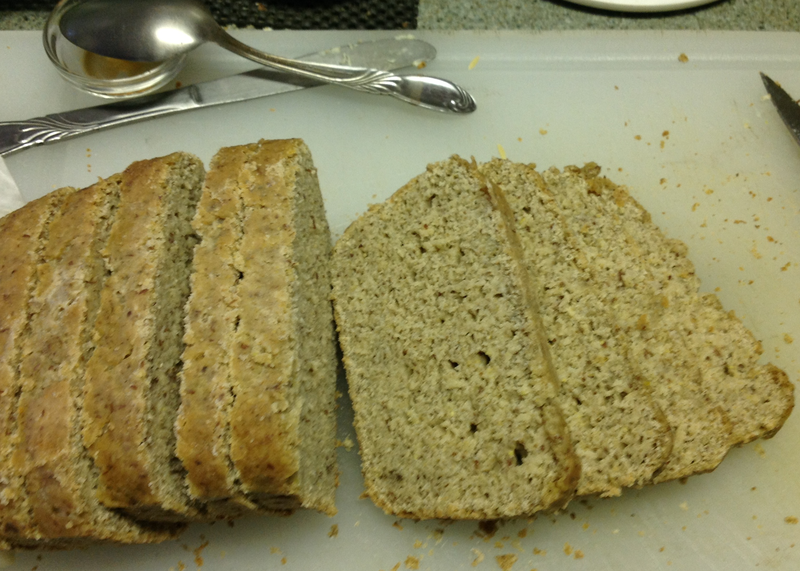
Please remember to allow several hours for rising as this is a sourdough recipe. It will need more time than a yeast bread that uses store bought yeast. 1 Cup GF Sour Dough Starter Mix Together and let set for several minutes: ½ Cup filtered water 2 Tbsp Chia Seeds, ground Mix dry ingredients together well: 3-4 Cups GF Flour (I used about 3 Cups) 2 Tbsp Ground Flax 1 tsp Sea Salt 1-2 Tbsp Honey (I prefer 1 Tbsp) ¼ Cup Olive Oil About 1 Cup filtered water Grease a bread loaf pan and set aside. In a large bowl, place the dry ingredients and mix well. Pour the chia seed/water mixture, sourdough starter, honey and olive oil onto the dry ingredients. Add about ¾ Cup of filtered water. Mix together. If too dry or stiff, add a little more water, ¼ Cup at a time. You want your dough to be gooey and sticky. You will be spreading the dough into the pan, not shaping it like a “normal” bread dough. This recipe will not be kneaded, like traditional bread dough. Once the ingredients are well combined, scrape dough into the prepared bread pan. The dough should fill about 2/3 of the bread pan. To make a nice rounded top, I take my silicone spatula and dip it into water. Use the damp surface to smooth the top of the loaf. You may need to re-dip several times to smooth the entire loaf. Be careful not to make the spatula too wet. You don’t want water to puddle on top of or at the sides of the loaf. I shape it rounded on the top like a traditional bread loaf. Although a squared loaf would look like squared-sandwich-style loaves from the store! For the squared loaf, simply spread the dough evenly across the top with the damp spatula. Cover and allow to rise for about 4-8 hours. This recipe does not quite double like standard bread recipe does. I waited for our loaf to get about ½ inch above the top of the pan before baking. Bake for about 1 hour and 15 minutes at 350 degrees F. The outside crust does not brown quite like regular bread. We find the crust is nice, like an Italian bread, while the center is soft. It has taken me a few loaves to get the timing right for my oven and our elevation. You may need to cut back some on time, or even add a bit. I found that the “thump” test worked well with this loaf!!! If you thump the top of the loaf and it sounds very solid, it still needs a bit of cooking time. Remove from the oven, butter or oil the top, and allow to cool. Remove from pan and slice! Easy Gluten Free Biscuits
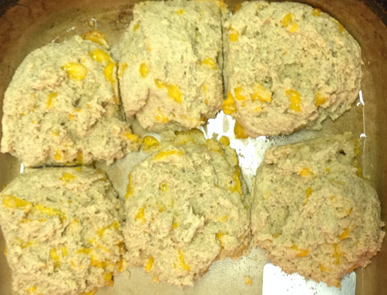
2 Cups plain yogurt (I tend to use slightly less for our GF flour – about 1/3 Cup less) 1 Egg, beaten 2 Cups GF Flour 2-3 tsp baking powder 3/4 Cup shredded cheddar (We love sharp – stronger flavor to match the garlic) ½ Cup Parmesan cheese Fresh Garlic, crushed (Can use powder, but not as tasty) (To make them exactly like that restaurant, add a pinch or two of Old Bay Seasoning) Mix all ingredients together in a bowl (I like to mix the cheddar closer to the end of mixing so it doesn't break up as much). Scoop by spoonfuls onto greased baking sheet (makes 8-12 biscuits, depending on size). Bake at 350 degrees for 8-12 minutes (Mine took longer – they were still gooey in the middle. IDK if it was our elevation or that I used kefir! <3) If you would like, you can brush them with melted butter, or even garlic-butter, when fresh from the oven. I find this makes them crumble more, though. So I just let people dress them at the table. GREAT with soups, salads, gravy, any way you like to eat biscuits. Oh, and yes, even for breakfast with sausage gravy (TURKEY sausage! LOL). Notes: This is a modification of a basic recipe I have been using for some time. The Basic recipe is just the yogurt, egg, flour and baking powder. It was an easy recipe I found somewhere and can be adapted to make rosemary garlic, Italian spiced, or even Cajun biscuits to go with Southern fried chicken; AND it’s quick. Use your imagination to create flavors your family will enjoy! Up here on the ridge, I have had to learn to bake differently than in the flat-lands of New Jersey. So I tend to add the baking powder at the very last minute. Which I don’t like!!! I prefer to mix it with the dry ingredients ensuring it is mixed through. Yet if I mix it in early, it tends to go flat – even freshly opened baking powder. I put this in because it might help those of you who are above 3000 feet if you have issues with the recipe. I prefer kefir over yogurt because it has more health benefits. It is also a lot softer, sometimes even runny. So, I find I have to cut back dramatically on this measurement if using it. You may need to adjust a bit, too. I ran out of kefir this week because we were frozen in. So, in a pinch, I used 1/3 block of cream cheese softened, then blended with a little water to make a yogurt consistency. It made them REALLY rich and delicious!!! Oh, I also left out the parmesan because we were out of it, too! These biscuits are wonderful made with a combination of sour cream and yogurt (again, I would use Kefir!), and then mix in some freshly chopped chives and a sprinkle of onion powder. For this, split the yogurt required into 1 Cup Yogurt, 1 Cup sour cream. OH! And cheddar or parmesan also go well with the chives! I find that once I figure out exactly the mixture for our elevation, I can just toss the basic ingredients in a bowl and have fun with them!!! I was thinking, maybe next week, trying something a little different – making them with raspberry jelly filling for breakfast. For this, I will mix the basic recipe, maybe adding a pinch of sweetness with organic sugar or a touch of honey. Then plop half the normal amount onto the baking pan, make a small indent, fill with some jelly, then top with another plop of dough. Bake as usual. Will let you know how that turns out! For Gluten Free Flours - I prefer Bob’s Red Mill or King Arthur, but this works with any Cup for Cup GF Flour. These two tend to be most cost effective for me and not as agitating. I am one who is bothered by Xanthan gum and other gums, so when I can, I actually prefer to mix up my own GF flours. If you try the recipe, make sure to let us know how it turned out! Would love some feedback on our recipes. Shalom! 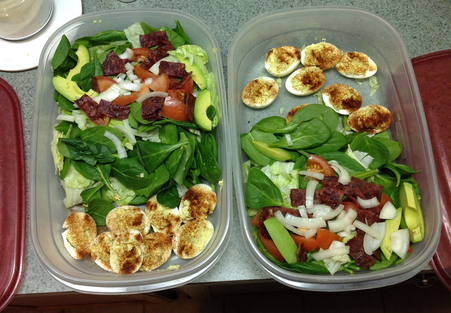 Yummy Shabbat Salads to go with our homemade dressing! Yummy Shabbat Salads to go with our homemade dressing! We don't buy many pre-mixed foods from the store anymore because of the hidden ingredients. This includes dressings and dips. Pretty much the only dips we purchase are different types of hummus if it’s on sale, or we don’t have time to make it ourselves. Homemade IS much healthier all the way around – plus, it costs less and you can control what goes into meals. For those who are used to the higher salt content and flavor enhancers of pre-made dips and sauces, it might take some getting used to. Yet in the long run it will be better for the entire family. I wanted to share our favorite recipes to go along with all the wonderful unleavened bread recipes we have on this page. With the Passover holiday approaching, it is a good time to learn to make these recipes and find out if you need to tweak them for your environment. That way, when the Spring Feasts are upon us, you will be ready to go and have a great variety to entertain with. I hope you enjoy these recipes! Drop a comment or message us with any questions! Shalom! Dairy Free Dressings or Dips
Bacon Horse Radish Dip 2 Cups Mayo 3-4 slices turkey bacon cooked crisp and crumpled 1 Tbsp Prepared horseradish 1 Tbsp Worcestershire sauce (Soy Sauce also works) ½ tsp hot pepper sauce Garlic powder to taste Mix well and refrigerate several hours. For Dressing: add liquid of choice – soy milk, almond milk, water. ~~~~~~~~~~~~~~~~ Easy Sweet and Sour Dressing or Sauce 1 Cup Ketchup ½ Cup water ¼ Cup vinegar 1-6 oz jar of all-fruit apricot jelly 1/8 tsp ground ginger Dash of Soy Sauce (If sweeter is desired, add 1/3 cup brown sugar). Heat all ingredients in a small saucepan, bring to a boil and simmer for 15 minutes. Allow to cool for salad dressing. May also be used as a sauce on baked or grilled chicken. ~~~~~~~~~~~~~~~~ Judi’s Veggie Dip 1 Cup Mayo 1 Cup Sour Cream (Plain non-dairy yogurt for a non-dairy version! Remember that coconut yogurt MAY impart flavor that will distinctly change the flavor of the dressing) 1 ½ tsp dill weed 1 ½ tsp Seasoned Salt 1 Tbsp Dried onion flakes 1 Tbsp Dried Parsley Garlic and onion Powders Dash of Black pepper Mix well and allow to sit for at least 4 hours. To make a dressing consistency, add ¼ to ½ Cup water and mix well. NOTE: For dressing, I mix in about 1/3 Cup water at this elevation and use my hand blender. It does also puree the onion flakes, but it ensures that the water is less likely to separate from the oily mayonnaise. Spicy Cajun Dip ¼ tsp Garlic Powder 1 Cup Mayo 2 Tbsp dried minced onion 1 tsp Paprika ½ tsp Cayenne pepper ½ tsp Black Pepper (For salad dressing, add ¼ to ½ Cup water) Blend all ingredients well and allow to chill for several hours. ~~~~~~~~~~~~~~~~ Ranch-Style Dressing 1 tsp. dry parsley 2 Tbsp fresh chives 1 tsp dried dill weed ½ tsp dried oregano ½ tsp onion powder ½ tsp paprika 1-4 Cloves of Garlic, crushed Salt and pepper to taste For Spicy: add a dash of Cayenne 1 Cup Mayonnaise ¼ to ½ Cup water Mix well. Allow to chill for several hours. Serve. It has been a couple of years since I have made my Lefse Bread recipe and I thought I would share a quick update. We have moved to a much higher elevation since the last time I made them and noticed that I have had to make some changes. In using the recipe at over 3100 feet above sea level, I discovered this year that I needed to add an additional ½ Cup of flour before they were the consistency that I could roll them out thin enough without sticking. I thought I would mention this in case anyone else has a similar experience. Most recipes I do not need to change up here, but this is apparently one that does need it! An additional note is, in adding the extra flour for the bread, I ended up with more dough than I needed for two meals. I took the extra dough and added another ½ cup of flour to it, cut it into balls, rolled them in extra flour and then used my pasta machine to turn them into crackers! I baked these crackers for 15-18 minutes at 375 degrees F. I have to say, these are the best crackers I have made in a long time. Even Jim said the same thing! They are delicious with some lentil humus and salsa verde with extra cilantro. We truly enjoyed them with breakfast this morning! Just thought I would share some additional ideas in case matzah is starting to get boring. Shalom!!! Lefse Bread 2 Cups Mashed Potatoes, potato flakes rehydrated work well 2 Tbsp butter or EVOO 3 Tbsp Milk (Heavy cream makes the best, whole milk 2nd best, 2% okay, skim not so great) ½ tsp salt 1 Cup flour, wheat works well (May need a little more to make the dough not too sticky) Mashed potatoes need to be completely cooled before using for this recipe. Leftovers work wonderful. Work the butter, milk, and salt into the potatoes until well blended. Add flour and knead just a little to make a smooth textured dough. Divide dough into 6-9 rounds. Roll each into a thin circle or square on a floured board. Cook lefse on an ungreased hot griddle on medium heat until lightly browned, flip and lightly brown the other side. Serve with butter or as bread with your favorite meal. 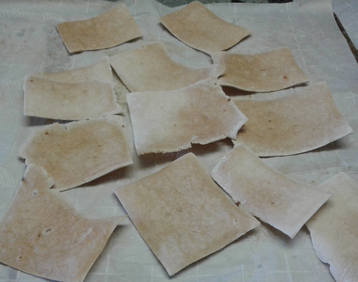 Before and during the Feast of Unleavened Bread I find my time can run short as we try to cook meals AND have plenty of unleavened bread for each day. I love shortcuts and a couple of years ago, I was SO tired of using my rolling pins. I have two kinds – the heavy marble one and a smaller one that is great for one-handed rolling of dough. Both work great - and a great work out, but both can get tiresome around day three! Since scripture does say that we are to eat unleavened bread each day for seven days (Exodus 12:15; 13:6), we also get tired of eating matzah every single day. My husband and I enjoy the wonderful flavors of Yahweh’s blessed spices and herbs, so I started going through all of my normal recipes for flat breads to see if I could find other things to eat during the feast. EASY flat breads. I found a number. One of our favorites happens to be my whole wheat cracker recipe which I made for our freshly ground whole wheat flour. We enjoy them as Rosemary-garlic, onion, Mexican spiced, toasted onion, dill, and sometimes just plain garlic – we do tend to eat a LOT of garlic! We also enjoy them as parmesan crackers AND sprinkled with finely shredded cheddar cheese, too. It is a very versatile recipe and can be eaten so many different ways. The most difficult part though, was coming up with a way to make them easy-peasy! With tired arms I started looking around the kitchen to find a better way to flatten this dough to cracker-thickness. The meat mallet just was not an option. That is when I saw it – THE PASTA MACHINE!!!!! I took a dollop of dough, ran it through and the rest is history! It was quick, easy, and made the perfect thickness for even baking that I just cannot get with rolling pins - no matter how hard I tried. Since then I have been using my pasta machine to roll them out throughout the year. We even use crackers now for light meals in summer - chicken or tuna salad on crackers is delicious and less filling on hot days. To use your pasta machine, you want your dough to be similar consitancy to pasta dough, not too dry and not too soft. You may need to play with the amount of flour just a bit to make sure that it does not stick in and on the machine rollers. Take a small piece of dough, about the size of a golf ball, or just a touch larger. Flatten it a bit as you would your pasta dough, and process just like you do pasta! A few helpful hints: I have my baking pans ready. I roll my dough into longer, thinner strips the length of my baking sheets. I can usually get about 3 strips of flattened dough onto one baking sheet, then I cut them with the pizza roller. When the baking sheet is “full” of crackers, I bake according to recipe instructions! For my pasta machine, I have to start with the rollers on “1” – which is the widest setting, and work my way down to 4 or 5. I cannot go to “6” because it is too thin and I find it tends to burn the crackers more easily while baking. You may need to play with this for your machine to see what thickness you tend to prefer. I will say, most people who try our plain whole wheat crackers think they taste just like that national brand that is now almost $5 a box in our local stores! Especially when we use real butter instead of oil. I hope you enjoy them as much as we do and that they help you create great variety and new ideas for your Feast! Shalom! P.S. Almost forgot: They also taste great dusted with cinnamon-sugar and spread with cream cheese, OR use any one of the herbed recipes dipped in humus or Baba ghanoush!!! 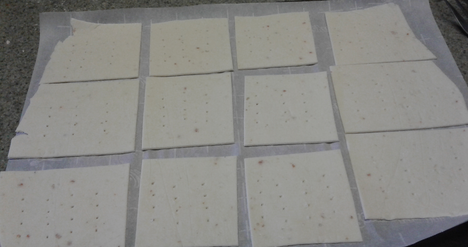 Gluten Free Matza Crackers Gluten Free Matza Crackers For my gluten free bread recipes, I currently use Bob's Red Mill Gluten Free Flour which I am able to buy in bulk from Sam's Club. Normally I can purchase the 1 to 1 Baking Flour from Bob's, but the other Bob's Red Mill Gluten Free Flour also works well. You MAY need to play with these recipes just a little bit to get the flour amount and dough/batter consistancy just right if you use something different than a 1 To 1 flour. In those cases, I suggest adding all the flour except 1/3 cup and mix well. Set aside that 1/3 cup until you have the dough/batter mixed up. Then add additional, 1 Tbsp at a time, as needed. I will note that the cracker recipe, which I use to make matzah for the Feast, does not work well in the pasta machine for me. It tends to be too gooey and sticks terribly. I am still playing with that recipe to get it just right to be able to make crackers as quickly and easily as possible. Will post a new recipe when I get that accomplished! Our cracker recipe, I actually do leave out the baking powder all the time. I don't see much difference between when I add it and when I don't. We do not believe it is a true leavening agent from a biblical perspective, but I marked the recipe as optional for those who want to leave it out for the Feast. For more on this topic, I invite you to read our blog, Pesach Panic! Please feel free to send me questions and comments if you have any and I will answer as quickly as possible, as I am also preparing for the Feast. Thank you in advance for patience and understanding. SHALOM!!!! MY FAVORITE GLUTEN FREE UNLEAVENED BREAD RECIPES from Torah For Women© Gluten Free Crackers 8 oz Gluten Free Flour (WEIGHED not measured in cups) 1 tsp Himalayan Pink Sea Salt 4-6 oz filtered water 1/4 tsp baking powder, optional, for a lighter cracker (Can leave out for the Feast of Unleavened Bread) Salt, dried garlic (finely chopped), dried onion (finely chopped), or other toppings if desired. IMPORTANT NOTE FOR THIS RECIPE: The key for this one is that it is NOT a “Cups" recipe, and needs to have the flour measured out in ounces. Many GF flours are different by weight, so this is very important for the right consistency dough. A simple kitchen scale or postal scale will work well here. Preheat oven to 400. Mix all dry ingredients well. Place a well in the middle of the dry ingredients and gently pour in about 4 ounces of the water, setting aside the rest in case it is needed. Mix all ingredients together with a fork until forms a nice ball. The dough needs to be soft, but NOT sticky. If it is too dry, add a little more water, 1Tbsp at a time and mix well. Knead gently for just a minute or two. Cut dough in half. On parchment, roll out one half very thin. Then do the same with the other half. With a fork, poke holes in the dough to allow steam to escape while cooking. Cut to desired size using pizza cutter. I usually cut to individual cracker sizes, like snack crackers. Bake for 5-15 minutes, depending on size you cut the crackers into. Watch them carefully and if they need more cooking time, only add 2-3 minutes at a time so that they do not over-cook or burn. These can go from almost done to burnt in just a short period of time. So PLEASE remember to keep an eye on them, don't get distracted - because the over done ones taste nasty! Depending on your humidity outside and inside they can last for up to a month. Store in an airtight container or jar. Serve with your favorite dip, soup, salsa, cheese, or hummus. VARIATIONS: Add 1-2 tsp rosemary to the crackers for a taste treat. You can also add other herbs or spices to go with the dip, cheese, or soup you will be serving these with, or Parmesan cheese to the dry ingredients, before adding water. With dry herbs or Parmesan, you may need to add a bit more water to make it roll-able. Herb suggestions: Dill, onion, garlic, chive, chili powder, Thyme. Gluten Free Naan Bread 1 Tbsp ground Chia seeds +1 Tbsp water, place in a bowl & sit a minute 1 Cup Gluten Free Flour 1 Cup Organic Whole Milk (Or 1 Cup water & 4-5 Tbsp THRIVE Powdered Milk)Salt to taste Spices: Fresh or dried dill, curry powder, onion powder, garlic powder Mix together all ingredients. Batter should be somewhat runny so that when you place it on the griddle it flows evenly. Heat an electric griddle to 350 degrees F. Pour about 1/3 cup batter onto hot griddle, spread thin with a spatula, keeping in a circle shape as best as possible. Allow to cook first side until top is no longer wet and flowing, without burning bottom. Flip and cook the second side just until done. Remove from griddle and continue until all batter is used up. Stack naan breads in a circular pattern on the serving plate to keep them warm and to make ready for serving. Serve with Curried chicken, humus, baba ganoush, or any of your favorite fillings. Also delicious spiced with southwestern spices and served as a soft taco shell or wrap. You can also vary the gluten free in gredients a bit for a slightly different flavor. Here are two alternate recipes that I have used with success - the one with coconut flour has a distinct coconut flavor and may not go with all main dish meals. Alternate Recipe 1 1 Tbsp ground Chia seeds + 1 Tbsp water, place these in bowl & sit a minute 1/2 Cup Almond Flour 1/2 Cup Gluten Free Flour 1 Cup Organic Coconut Milk (Or 1 Cup Organic whole milk, or 1 Cup water & 4-5 Tbsp Powdered milk, for creamier texture) Salt and herbs to taste Alternate Recipe 2 1 Tbsp ground Chia seeds plus 1 Tbsp water, place in bowl & sit a minute 1 Cup Almond Flour 1/8 Cup Gluten Free Flour 3 Tbsp Coconut Flour 3 eggs 1 1/2 Cups whole milk Salt and herbs to taste Dutch Oven Pancake ½ Cup butter 6 eggs 1 ½ Cups milk (higher fat works better – whole or 2%) 1 ½ Cups gluten-free flour Prepare a 4 ½ quart pan (I use my 11X2 inch round stoneware baking dish). Feeds 4-6 people. Melt butter in the pan in a 425 degrees F oven while it preheats. Put eggs into blender and whirl on high speed for about 1 minute. With motor running, pour in milk. Slowly add flour with motor running, about 1 heaping Tbsp at a time. Continue to whirl for 30 seconds. Pour into the pan while it’s still on the oven rack. Close oven and bake until puffy, about 20-25 minutes. DO NOT OPEN THE OVEN DOOR WHILE BAKING! Pancake will “fall.” Some pancakes puff up on the outside edges, giving a unique lifted outer edge. NOTE: This recipe is the same as my standard recipe using wheat flour. It may not cook up quite as “dramatic” in presentation as the original recipe and tends not to puff up the sides as well. Yet it is still delicious and works wonderful served with fruit, syrup, or sprinkled with powdered sugar.
As Passover and the Feast of Unleavened Bread approach quickly this week, I wanted to give some ideas and suggestions for my favorite unleavened breads to serve during the feast. These recipes work well for individual snacks or as additions to different meals. I hope these help spark new ideas of your own as you discover you already have recipes lying around in your kitchen, too! Just a note: I am posting these all as one large post for now. As the week goes on, I will be uploading individual PDF versions that you can print yourself. These versions will be of each individual recipe so that you can pick and choose which ones you would like to try! Chag Sameach Pesach and Shalom!!!! My Favorite Unleavened Bread Recipes for the Feast (From TorahForWomen.com©) Whole Wheat crackers 2 Cup Whole Wheat Flour 1 Cup water 4 tablespoons butter, room temperature (May use 2 Tbsp Olive Oil, if desired) 2 tablespoons dried herbs of your choice, optional oil for brushing coarse salt: kosher or sea salt, for sprinkling on top Mix together the flour, salt, water, butter or oil, and optional herbs to make a smooth (not sticky) dough. To roll out with a rolling pin: Divide dough in half. Shape each half into a small rectangular slab. Cover with plastic wrap, and refrigerate for 30 minutes, or up to a couple of hours, until the dough is firm. Preheat the oven to 350°F. Very lightly flour a piece of parchment, and the top of the dough. Working with one piece at a time, roll the dough to about 1/16" thick. The dough will have ragged, uneven edges; that's OK. Just try to make it as even as possible. Transfer the dough and parchment together onto a baking sheet. Lightly brush top with oil and sprinkle with desired amount of salt. Cut dough into 1 to 1 1/4" squares; a pizza wheel works well here. Prick each square with a fork. Bake crackers for 10 minutes, turn baking sheet around in oven to encourage even baking. Close oven and bake for another 10-15 minutes, being careful not to burn. Remove crackers from the oven, and transfer from the pan to a cooling rack. Store in airtight container for up to a week. NOTE: Also delicious without herbs and without salt Parmesan Crackers 2 cups Whole Wheat Flour 1 cup grated Parmesan cheese 1/2 cup (8 tablespoons) cold unsalted butter (I have also used ¼ Cup EVOO – extra virgin olive oil) 1/2 cup whole or 2% milk coarse sea salt or additional Parmesan for topping NOTE: I don’t add salt into my cracker dough because I tend to sprinkle it on top Instructions Preheat oven to 400°F. You will need several large baking sheets;un greased. Whisk together dry ingredients: flour, salt, pepper, and Parmesan. Adding the cold butter, work in until no large pieces remain - mixer or by hand. Drizzle in milk and mix, until dough comes together - may not need the whole 1/2 cup, so remember to drizzle. Gather the dough into a ball, squeezing to bring it togetehr. Divide into three pieces. Working with one piece of dough at a time, flatten into a rough square, and place on a lightly floured surface. Roll the dough 1/8" thick. I prefer to roll out on parchment so that I do not need to transfer it to a baking piece of parchment. If you did not roll on parchment, transfer the dough to a piece of parchment. Using a sharp knife, pizza cutter, or pastry wheel, cut the dough into 1" squares; don't separate them. Lift onto a baking sheet. Sprinkle the crackers with coarse sea salt, additional grated cheese, and/or dried herbs, if desired. Repeat with the remaining pieces of dough. Bake the crackers for about 15 minutes, until they're a medium golden brown. Remove them from the oven, and cool right on the pan. When the crackers are cool, store them in an airtight container at room temperature. Mine never last long! Lefse Bread 2 Cups Mashed Potatoes, potato flakes rehydrated work well 2 Tbsp butter or EVOO 3 Tbsp Milk (Heavy cream makes the best, whole milk 2nd best, 2% okay, skim not so great) ½ tsp salt 1 Cup flour, wheat works well (May need a little more to make the dough not too sticky) Mashed potatoes need to be completely cooled before using for this recipe. Leftovers work wonderful. Work the butter, milk, and salt into the potatoes until well blended. Add flour and knead just a little to make a smooth textured dough. Divide dough into 6-9 rounds. Roll each into a thin circle or square on a floured board. Cook lefse on an ungreased hot griddle on medium heat until lightly browned, flip and lightly brown the other side. Serve with butter or as bread with your favorite meal. Scotch Shortbread 1 Cup butter, slightly softened ¾ Cup Powdered Sugar ½ tsp Almond flavor 2 ½ Cups flour ¼ tsp salt Beat butter until soft. Add sugar and almond extract and beat until smooth. Add flour and salt; mix well. Press dough evenly into a square pan. Mark the top into even squares (approx.. 1.5 inches). Bake in a 375 oven approx. 25 minutes. Remove from oven and cut along marks while hot. Cool in pan. Serve. NOTES: I like to use 10X10 square stoneware baking dish. A 9X9 also works well but may require a little more time baking. Be careful not to over bake. An 11 inch stoneware round dish also works great, then cut into pie slices. Dutch Oven Pancake ½ Cup butter 6 eggs 1 ½ Cups milk (higher fat milk works better – whole or 2%) 1 ½ Cups flour Prepare a 4 ½ quart pan (I use my 11X2 inch round stoneware baking dish). Feeds 4-6 people. Melt butter in the pan in a 425 degrees F oven while it preheats. Put eggs into blender and whirl on high speed for about 1 minute. With motor running, pour in milk. Slowly add flour with motor running, about 1 heaping Tbsp at a time. Continue to whirl for 30 seconds. Pour into the pan while it’s still on the oven rack. Close oven and bake until puffy, about 20-25 minutes. DO NOT OPEN THE OVEN DOOR WHILE BAKING! Pancake will “fall.” Some pancakes puff up on the outside edges, giving a unique lifted outer edge. Goes great for breakfast or a light supper! Served with syrup, dusted powdered sugar, or drenched in your favorite fresh fruits and fruit fillings! Pie fillings work great on this one! Easy Naan Bread 1 Cup flour ¼ Cup oil 2 Tbsp Chia seeds mixed with 1/3 Cup water (may use two eggs instead) Enough water to make a runny batter Mix ingredients well in a medium bowl. Heat an electric griddle. When griddle is hot, pour ¼ cup of batter onto hot griddle. Quickly and gently spread the batter thin. Cook just until done, flip, and cook until done. Place on a plate and serve warm with fillings.
|
For More
|
||||||||||||||||||||||||
Services |
Ministry
|
|
|
Compensation Disclosure: We participate in affiliate programs and are compensated. Therefore, if any reviews are given on this site they should not be considered unbiased reviews or an unbiased endorsement. Your purchase helps support our work so we will actively market and suggest products we are compensated for. We do are best to find trusted companies to affiliate with, but you are required to do your own due-diligence with any product or service prior to purchasing. We are not responsible for third-party actions, inaction, promises, guarantees, delivery, payment processing, or handling of your information, or after-sale service or support. Use of this site is your agreement to all the terms posted here or linked.
|
Scripture use: Whenever possible we will use the following Public Domain versions; the King James (KJV), Youngs Literal Translation (YLT), or World English Bible (WEB) versions. However, for greater clarity we may use other copyright versions of the scriptures by permission or under fair use. Click Here to see copyright information and statements for each version.
|


 RSS Feed